Published April 22, 2024
Trello is one of the first project management tools I was exposed to in my professional career and to this day, it remains one of my all-time favorites based on its ease of use, intuitive design, and the extensive list of features offered under its free plan.
However, I’m not here to rehash a review of this tool, but if that’s what you want, I’ve reviewed Trello here on The Ascent. Instead, I want to help provide a guide for planning and executing your project using this tool.
Overview: What is Trello?
Trello is a kanban-based collaboration and task management tool that is perfect for all kinds of projects or teams. This includes content teams, marketing projects, customer support tracking, sales pipelines, HR tracking, and even Agile project management.
This tool is an all-around great fit for most projects as long as your needs are not financial in nature because Trello doesn’t come with any budgeting or invoicing features.
In my opinion, Trello is the easiest to use project management software on the market considering its list of features and the level of convenience worked into its design.
How to use Trello for each step of the project management process
Since Trello is a collaboration tool rather than comprehensive project software, like Asana or Microsoft To Do, there are a few aspects of the project management basics that this platform does not cover.
For instance, you won’t manage any of your budgets or invoicing using this tool, but you can attach these types of reports to your tasks if need be.
Therefore I’ll be skipping over any financial steps of the project management plan as it relates to Trello. I’ve created my own board as one of the Trello project management examples so you can follow along as I demonstrate each step and function of this platform.
Here is a step-by-step guide on using Trello for project management.
Step 1: Setup your Trello project board and create task cards
Trello has a fantastic onboarding and setup process, so be sure to take full advantage of it with your first project. The setup process begins by filling in fields that’ll create your board lists. These lists are the steps of completion in the project, like the ones pictured below.
I created a sample project that includes steps for reviewing software, but you can use this kanban for all kinds of projects and steps, from issue tracking to content creation calendars.
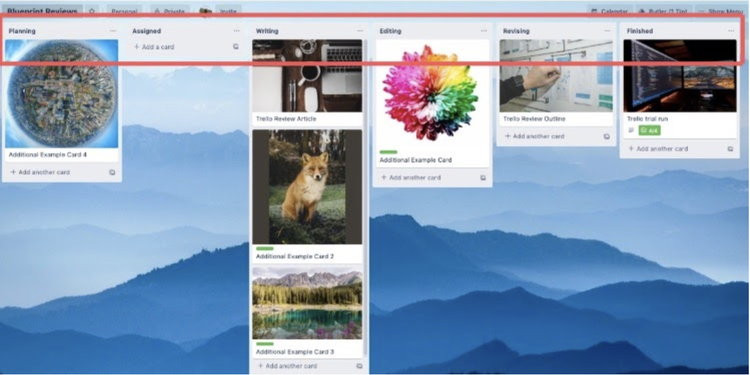
You can use my list names or create your own based on your project’s needs. Image source: Author
These lists are where your tasks will live on the kanban board throughout the execution process. If at any point you have to add additional steps to your kanban board, all you have to do is scroll all the way to the right to create an additional list to move your task cards to.
Step 2: Create task cards and assign them to relevant team members
Now that you’ve created your lists, it’s time to plan out your project and create the task cards.
If you’re picking up Trello midway through a project, you can create tasks at any point in the workflow by clicking on the “Add another card” button at the bottom of any list. Otherwise, you’ll most likely add tasks to the first progress step on the kanban board.
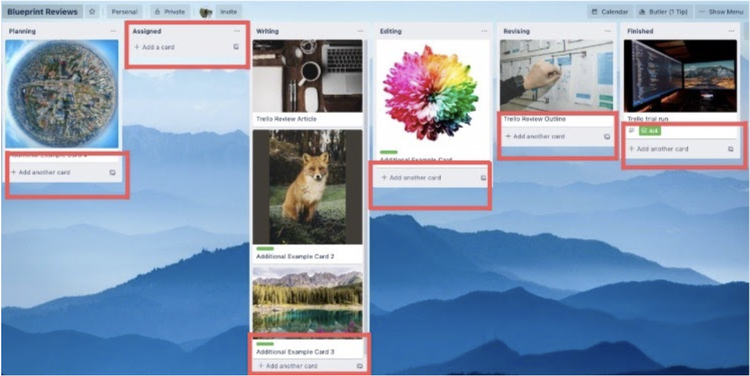
Trello conveniently offers a card creation button under each list. Image source: Author
Once you click on this button the new task window will appear on the screen, allowing you to fill in the relevant project details, such as:
- Due dates
- Card cover photos
- Descriptions
- Users
- Task comments
- Labels, which categorize and prioritize your tasks by team, importance, function, etc.
- Attachments, which can be files, images, documents, work breakdown structures, etc.
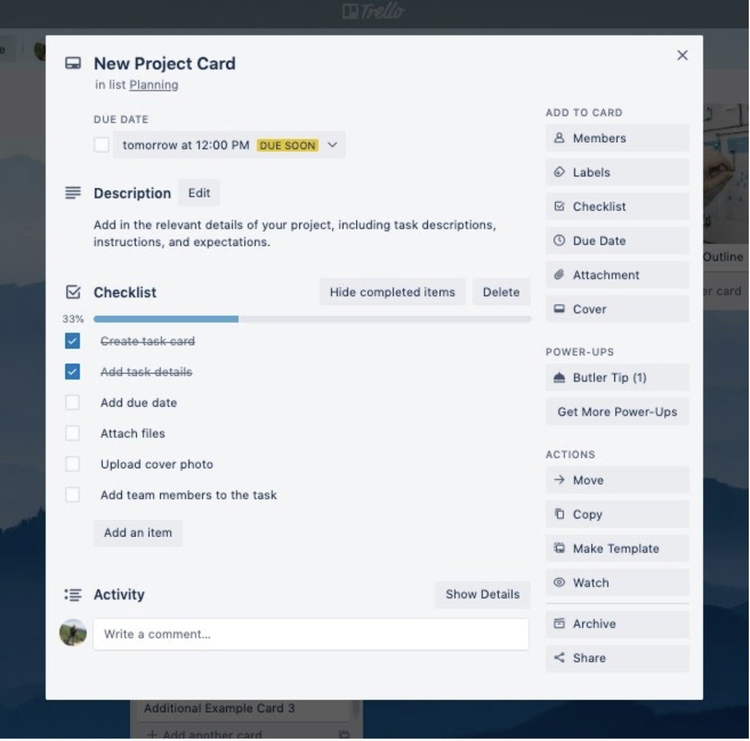
Trello has my favorite task checklist function of any platform I’ve used. Image source: Author
In order to give you a better sense of task progress, be sure to create a checklist in the card that’ll also display a percentage completion so you’ll never be left in the dark while tracking the execution.
Finally, you’ll want to add the team members responsible for these tasks to the card. All you have to do is click on “Members” on the right-hand menu while in any task window.
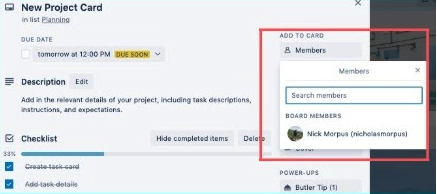
Nearly all task functions are listed on the left-hand menu. Image source: Author
Once you’ve added them to the task, these users will receive all project notifications, including comments, changes, and every time a card is moved along from one step to the next.
Step 3: Move the Trello cards along the board as steps are completed
As you move through the execution phase of your project, all you’ll have to do is drag and drop your tasks into each step of the process from the planning phase to completion.

Trello’s drag-and-drop function for task cards is extremely convenient. Image source: Author
While you progress through your project, you’ll be able to automate certain Trello functions that’ll streamline the execution process using “Power-Ups.” These automation functions will help you:
- Set new tasks to the top of lists as they move along the workflow
- Create new repetitive action cards on a regular basis as needed
- Sort cards by the label, due date, user, etc.
- Archive cards on a periodic basis
Automation frees up time for you to focus on executing tasks and tracking project progress without worrying about mundane details and actions.
Step 4: Close out the project upon completion
Once you’ve completed all of the tasks in your project it’s time to close out your project and perform your post-project analysis to find out how your team did, what you learned, and what you could do better in the future.
Coming back to the Trello “Power-Ups” there are multiple analytics and reporting add-ons that’ll help you measure the successes and shortcomings of your project.
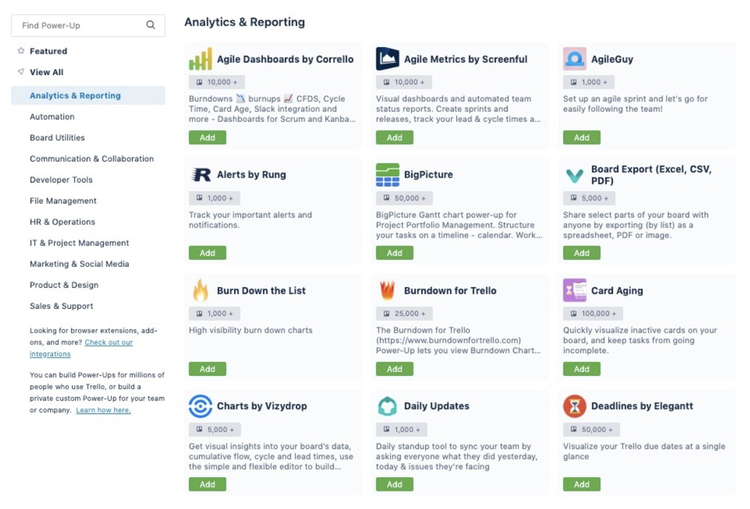
Trello has an extensive list of analytics add-ons that you can use for your project. Image source: Author
Once you’ve compiled all of your data using these add-ons, you can put together a post-project report to present to your team and the project stakeholders.
Step 5: Use your Trello board template for future projects
Now that you’ve put in the work and created your Trello board from scratch, why not save yourself the trouble if you plan on executing a similar project in the future? All you have to do is enter the menu, click on “more,” then select “copy board.”
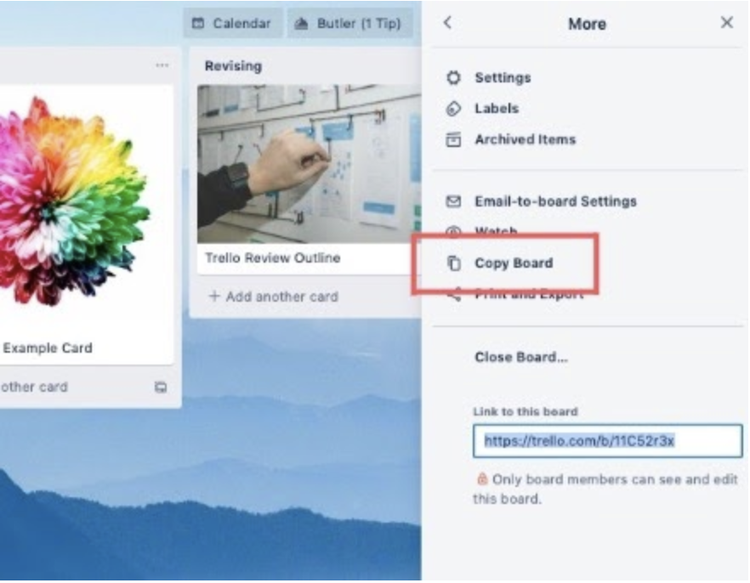
Rather than build every project board from scratch you can either copy an existing board or use a pre-made Trello template. Image source: Author
All you’ll have to do is reset your cards and adjust your lists as needed, but building off of previous boards is an easy way to create consistent workflows and save you tons of time during the planning step of your project.
Top 5 features for Trello project management
Trello is a streamlined project management solution that leans heavily into its collaboration setup. While this tool’s features are simple by nature, this platform offers many useful features that’ll make your life as a project manager or team member much easier. These are the top five features offered by Trello.
1. Kanban task management
This is the crux of this entire platform, as Trello task management runs solely on a kanban project management system. Using this management system you’ll have access to an overview of your project progress at all times with all steps and task cards listed on the main dashboard.
All tasks and any other changes to the cards are pushed through the workflow using a drag-and-drop system that automatically notifies and updates all users.
2. Card search
Sometimes task cards can get lost in the weeds of your kanban workflow, so searching for cards based on their name, users, or labels is an easy way to save yourself a scrolling fest while using Trello. This is a simple, yet powerful feature that I regularly use for my own projects as well as for my work with The Ascent.
3. Card cover photos
This is another simple, yet powerful feature that helps give context to project tasks. Task card cover photos can help break up tasks and make them more identifiable rather than creating lists of text that are harder to navigate.
4. Automation functions
Trello is perfect for simplifying the mundane processes of your project, including creating regularly executed tasks, archiving old cards, or sorting and prioritizing tasks.
All you’ll have to do is select an automation “Power-Up” from their extensive list and set the necessary parameters during the planning step of the project life cycle.
5. Task card checklists
I love the internal checklists you can create within your tasks. These checklists are easy to create and also provide you with a percentage of completion as you check off each accomplishment. This’ll provide project managers with the information they need about task progress without having to ask in emails or meetings.
Perfect your project management skills
Now that you understand the basic steps for planning and executing your project in Trello, why not brush up on and perfect your understanding of the project management process.
Here at The Ascent, we have lots of other guides that’ll help walk you through everything you need to know about project management, including:
Our Small Business Expert
Nick is a seasoned writer and digital marketing specialist with lots of experience in B2B software research. He has always had a passion for technology and has worked as an Apple technical specialist, in the social media startup scene, and also in local DC real estate.
Share This Page
We're firm believers in the Golden Rule, which is why editorial opinions are ours alone and have not been previously reviewed, approved, or endorsed by included advertisers. The Ascent does not cover all offers on the market. Editorial content from The Ascent is separate from The Motley Fool editorial content and is created by a different analyst team.
The Motley Fool has a disclosure policy.