Published April 22, 2024
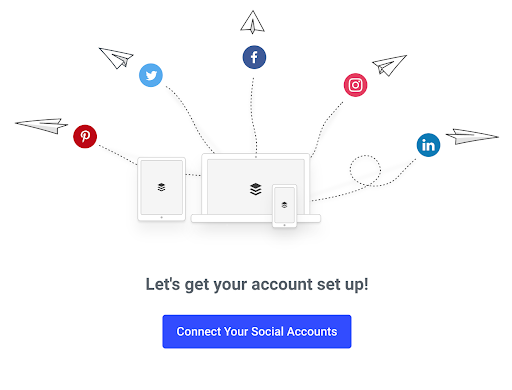
Setting up a Facebook business page allows you to showcase your brand, advertise, and measure impact. Let’s do it in one hour.
Your personal Facebook profile is very different from a business page. There were around 2.5 billion users on Facebook at the start of 2020, according to this Statista chart, and you are probably one of them.
On your own profile, you can measure the impact of your communications by counting how many “likes” you have on a post. (That is, if you measure such things on your personal profile at all.)
On your personal page, you don’t use social media analytics that allow you to measure how many people see your post (reach) or how many times it’s shown (impressions).
If you’re serious about Facebook and want to use it for sales or marketing, or integrate it into an inbound marketing strategy, you need a business page. They are easy to set up, and they come with ways to measure business metrics such as reach and impressions so you can measure the impact of your communication.
According to Facebook’s own measurements, there are 140 million active businesses across the Facebook family. The owners of those pages can present their brands to Facebook’s 2.5 billion users, measure the impact of certain activities, and access audience insights about target markets -- for free.
Overview: What is a Facebook Business page?
On a personal page, you can’t access any social media analytics, and it’s impossible to run social media campaigns. Let’s look at what you can do with a Facebook business page.
A business page is managed from your personal account. You can switch between your accounts as needed, you can post, like, comment, and follow in the same way you do with a personal profile. Your business page will also have a profile photo and a cover image.
One of the differences, though, is that a business page has more information. It sits in a specific business category, and it can showcase your products, indicate your business hours, and register check-ins.
Check-ins are a special type of post indicating that a user is at your business’s physical location. On a business page, you’ll also receive customer reviews and ratings.
Business pages are different under the hood, too. They provide access to page insights with some of the social media metrics you might be interested in.
They also allow you to gain insights into audiences sizes and segments as well as activate a powerful advertising engine to reach wider audiences. You’ll have to pay for the advertising, but the rest is free.
How to create a Facebook Business page for your small business
Setting up a business Facebook page is really easy, and it can be done in just an hour if you follow the six steps below. You’ll first create the page, then add visual elements, choose the username, and add information about your business. You should also add one or more posts, and perhaps some photos before publishing.
If you feel you haven’t quite reached the desired quality by the last step, simply postpone publication and improve what you’ve already created before you launch.
Step 1: Click Create
When creating your page, you’ll have the option to choose between a business page and a public figure page. If you want to use Facebook professionally for your personal branding, choose the second option. A public figure page has the look and feel of a personal profile but the back-end functionalities of a business page.
When creating your business page, the most difficult part is probably finding the right category for your business.
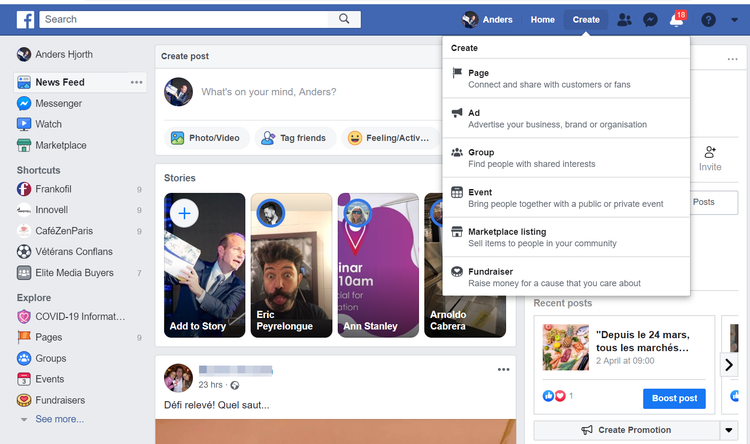
Find the Create menu for making a new business page in the top right corner of your personal Facebook page. Image source: Author
Tips for creating the page:
Log in to your personal Facebook account, and find the Create button in the top right corner of the screen. You’ll find yourself on a page asking you to choose between a business page and a public figure page. Choose the business page, give the page a name, and pick your business category.
- Find the right category: It’s important to be in the right category when users are looking for your business. Give it some thought, but also play around by entering various options to see what Facebook proposes before you choose one.
- Don’t be afraid: You’ll need to manually publish the page before anyone will be able to see it, and even when the page does go public, you won’t be immediately flooded with traffic, comments, and feedback, so don’t be afraid of not getting it right on your first go.
Step 2: Create the visual profile
Creating the visual profile is one of the most important parts of the page setup. Social media is very photo-driven, and users expect high-quality visuals, which can be a challenge to find. First, choose a template among the proposed themes.
You may have already prepared your logo, photos, and images as part of your social media marketing plan, but if not, this step could take a little longer. You can always put in placeholders and revisit this part later.
Tips for the visual design:
In this step, you’ll first upload a profile image: This could be your logo, or maybe your star product. Next, upload a cover image: This could be a picture of your storefront, your premises, or perhaps your team. It could also simply be a mood picture or stock photo that’s in harmony with your profile image.
- Find cheat sheets to get image sizes right: In the fast-moving world of social media, you should form the habit of looking for cheat sheets whenever you create visuals. Cheat sheets are pages published by design professionals that indicate the best image sizes for your visual elements on social networks.
- Attractive profile image: The profile image is the circle image people will see when they interact with your page that represents you and your business. Make it attractive!
Step 3: Pick a username
In your social media strategy, you may have defined what your usernames and handles should be. Think of the username as the nickname for your page. It’s the short code people will use to tag your page.
Tips for picking a handle:
The name can be maximum of 50 characters long, and you may want it to coincide with your other social media handles so that users on Instagram, Twitter, and (now) Facebook will know you by one name.
- Consistency with other profiles: It’s a good idea to use the same handle you use on other social media networks for consistency and memorability.
- Check competition: You may have competitors for your preferred nickname from other business categories. If so, find a good compromise that’s memorable, short, consistent, and available.
Step 4: Add business information and events
Your business account is now active, and you have access to a number of options personal profiles don’t have. You’ll need to set up the general description of your business as well as useful information for users, including opening hours, details of your products and services, special offers, events, and jobs.
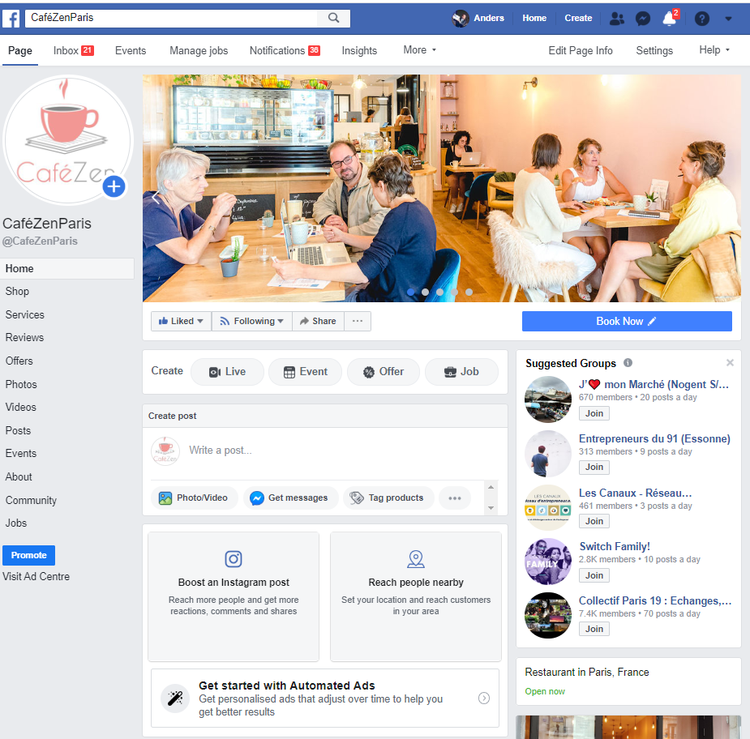
In this screenshot from a Facebook business page, we can see the navigation menu on the left side and various suggestions within the page itself. Image source: Author
Tips for adding business information:
Click on Settings, then open the Page info to enter your business description, additional business categories, address, opening hours, phone number, website URL, and products you offer.
After completing the Page info, visit the navigation items for Shop, Services, Events, and Jobs to add the information that’s relevant at this stage.
- Navigation: Navigating the user interface can be confusing at times. You’re seeing a page structure similar to what users will see, but you’ll also see navigation elements for managing the page as well as elements inside the page structure suggesting updates and additional configurations.
- Don’t overdo it: You likely don’t have any visitors yet, so don’t publish everything you have at this stage. A community will build as you add elements, so focus on the essentials for your launch.
Step 5: Start posting
After putting the overall page structure in place, it’s now time to add content into the page feed so it doesn’t look empty when your first visitors arrive. You do this by posting to the page.
Your publications, or the posts you make to your page, are best organised with a social media content calendar, and if you already have one, you’ll know what to post.
Tips for posting to your page:
Publish a post to your business page via the same process you use on your personal Facebook profile. Add a photo, some text, a mood, and perhaps some emojis. You could make your first post say, “Hello Facebook, our business page is up. What do you think of it?”
You can pin a post to the top of the page so it remains the first post people see when they get there, even if you make other posts after it.
- Get your tools in position: At this point, you’re ready to integrate your page with a social media management tool, if you’re using one.
- Old posts: To get started, why not post some historical content you’ve already used on other social networks? This will give the page some depth even before launch.
Step 6: Publish the page and invite people in
It’s been less than an hour, your page has a username, a profile image, and a cover picture. You’ve described your business, listed your products and services, indicated your opening hours, and even published a couple of posts. You are open for business!
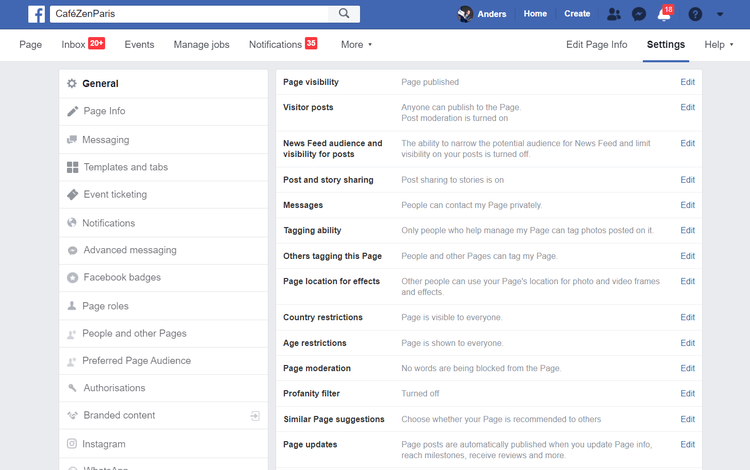
The Settings page gives you access to all of the variables one can configure on a Facebook business page. Image source: Author
Tips for inviting people to your page:
To launch the page, you need to change the page status from unpublished to published in the settings. The page will go live, and your next important task will be to drive visitors and fans to the page. No one will see your content if you’re posting to a page with no fans. So, you still have a major challenge ahead!
- Invite all of your friends: Go to the Community section of the navigation menu, and invite your friends to “like” the new page. This will allow them to see content you publish.
- Announce the page: Find the URL for the page and announce it by email, link to the page from your website, and also look for other digital marketing tips to promote your page.
The best social media management tools for monitoring your Facebook Business page
Your page is live, and you’ve published your first posts. Your most important job now will be to create the content to post and perhaps revisit some of your page settings once you have some traffic.
To continue posting in an organized manner, you might want to use a social media management tool; here are a few you might consider.
1. Later
Later was created as a tool for managing Instagram posts, and it’s great for managing images for publishing on Facebook, too. If your social media strategy is very image-rich and you plan to manage both Instagram and Facebook, Later might be a good choice. With it, you can also manage publishing on Pinterest and Twitter.
The comprehensive calendar view of Later is one of its strengths.
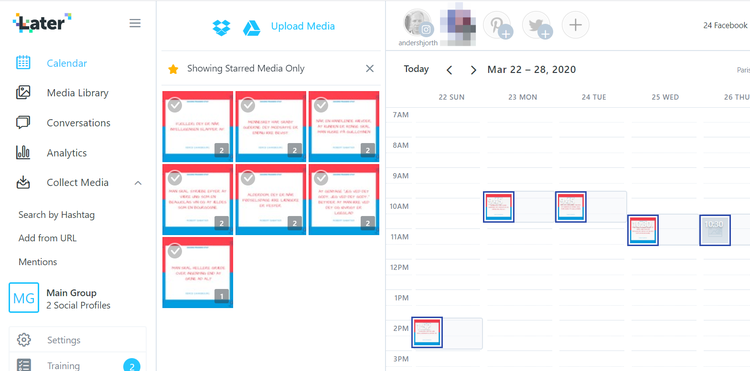
The calendar view in Later provides a clear overview of scheduled posts as well as immediate access to preferred media that can be pulled directly into the calendar. Image source: Author
2. Buffer
Buffer is one of the most popular social media management tools. It’s easy to use and provides a visually pleasing content calendar overview. Buffer offers a free version that allows you to connect three social networks, and it can be a great place to start.
Buffer is easy to use and has a free version for limited usage. Image source: Author
3. Sprout Social
Sprout Social is an all around social media management package that covers practically every company’s needs when it comes to social media. It’s easy to use in the complex world of social media management.
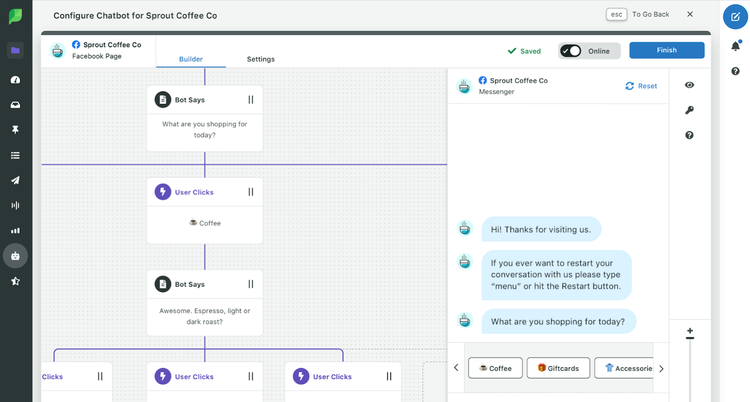
With Sprout Social, it’s even possible to configure a chatbot for a business page. Image source: Author
The frame is up. Now paint the picture
In the digital age, things are turned upside down. We’ve just created the frame for your brand exposition, but the picture is not yet painted.
Your business page is an essential part of your setup for communicating with an audience on Facebook, but more important will be what content you publish, how often you post, how good you are at engaging with your audience, and how you manage to build and expand a community for your page. Let the artist come forth.
Our Small Business Expert
Anders Hjorth is the author of four digital marketing insights reports and the founder of Innovell, a Digital Marketing consultancy researching trends in digital marketing. As a pioneer in SEO, one of the first Google Advertising Professionals, and the co-founder of several agencies, he has broad and long-running experience across SEO, paid search, social media, and content marketing. Anders was COO for GroupM Search across EMEA. Anders is also an active member of various awards juries and advisory boards including the Paid Search Association.
Share This Page
We're firm believers in the Golden Rule, which is why editorial opinions are ours alone and have not been previously reviewed, approved, or endorsed by included advertisers. The Ascent does not cover all offers on the market. Editorial content from The Ascent is separate from The Motley Fool editorial content and is created by a different analyst team.
The Motley Fool has a disclosure policy.