Updated
If you’re a QuickBooks Online user, chances are you’ll be creating a lot of invoices. If you’re not sure where to start, just follow our step-by-step process.
If you’re new to QuickBooks Online (or even if you’re not), you may be looking for some detailed instructions on how to create an invoice.
The Ascent has you covered. In our step-by-step guide, we’ll take you through the initial invoice access screen, show you how to add additional charges, make an invoice recurring, and send a reminder to a customer about a past-due invoice.
Invoicing is arguably the most important thing that you’ll be doing in your accounting software. If you’re using or considering using QuickBooks Online, we’ll show you the way.
1. Access the invoicing option
Your first step will be to access the invoicing option in QuickBooks Online. Clicking on the New tab on the main screen will bring up a list of options under four categories: Customers, Vendors, Employees, and Other.
Under the Customers column, your first option is Invoice. Click on that to begin customizing and writing an invoice.
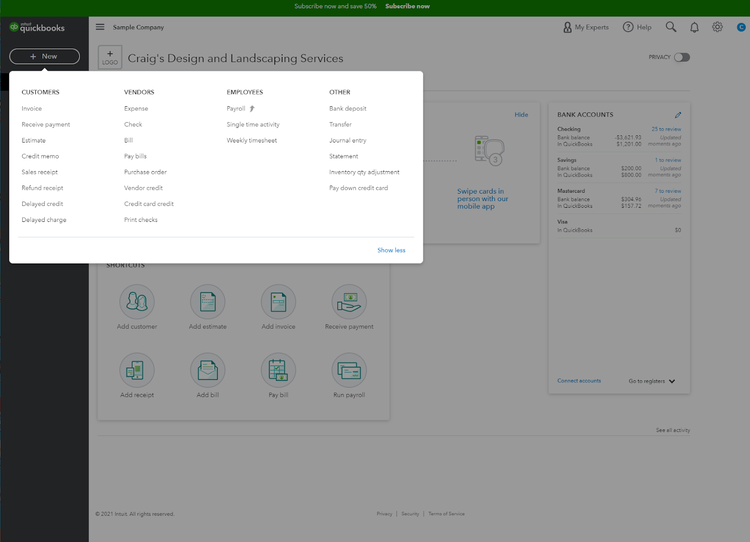
To get started, click on New on the homepage, and then choose the feature you wish to access. Image source: Author
2. Choose the template you wish to use
You can set up and customize any QuickBooks Online invoice during the setup process or wait until you’re ready to enter an invoice and choose the Customize Invoice option at the bottom of the screen.
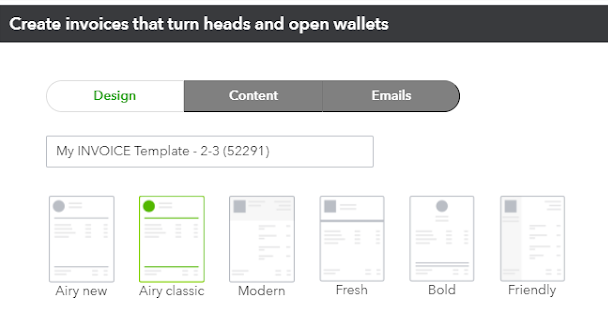
You can choose the invoice template you wish to use by clicking on one of the template options. Image source: Author
The first thing you’ll need to do is choose the template that you wish to use. QuickBooks Online offers six templates to choose from.
- New
- Classic
- Modern
- Fresh
- Bold
- Friendly
Clicking on any of the images will display a sample invoice using that particular template, making it easy to pick the one you like best.
Once you choose your invoice template, you’re ready to move on to the next step.
3. Complete the customization process
Now that you’ve chosen your template, you can complete the customization process, which includes uploading your company logo, choosing the color scheme you wish to use, and selecting a font. You can even edit current print settings from the customization screen as well.
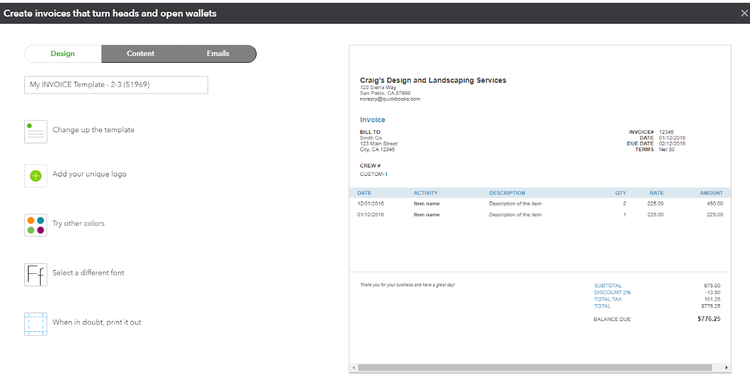
You can choose the invoice template you wish to use and add custom details using the invoice customization feature. Image source: Author
Each time you make a change, the invoice sample to the right of the screen will update to reflect your current choices. Be warned, you can find yourself spending a lot of time playing around with these options. And remember, you can always go back and update any of your chosen options, so don’t worry if you don’t love the custom invoice format you’re currently using.
4. Create an invoice
Now that you’ve customized your invoice options, you’re ready to invoice a customer. The invoice format in QuickBooks Online is intuitive and allows you to add a customer, product, or service at the same time that you’re entering the invoice.
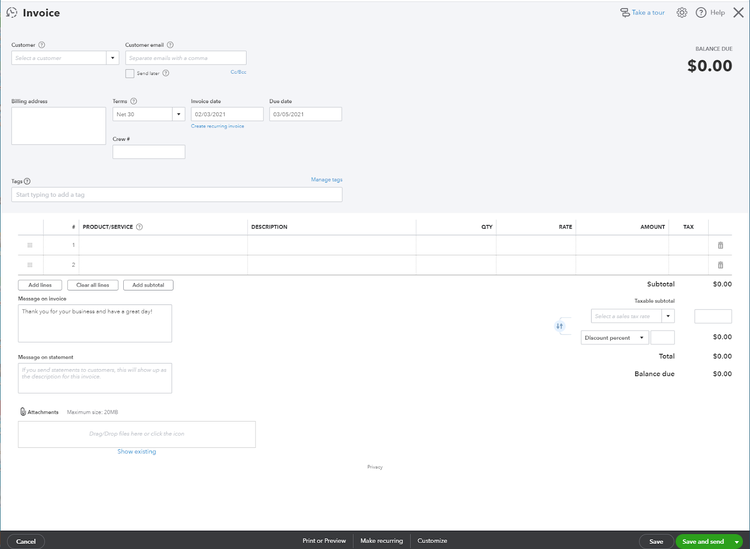
The invoice screen in QuickBooks Online uses dropdowns for all fields. Image source: Author
You can use the drop-down menu to the right of all data entry fields to locate the data that you’re looking for, including invoice terms and due dates. And for quicker invoice delivery, be sure to add your customer’s email address to the invoice, so you can email the invoice immediately rather than spend extra time printing and mailing it.
5. Add additional information
Along with standard invoicing options, you can also include a message on the invoice, and if you send statements to your customers, you can also include a message on the statement.
Another feature is the ability to attach documentation to the invoice. This can come in handy if you need to provide your customers with additional backup such as warranty information.
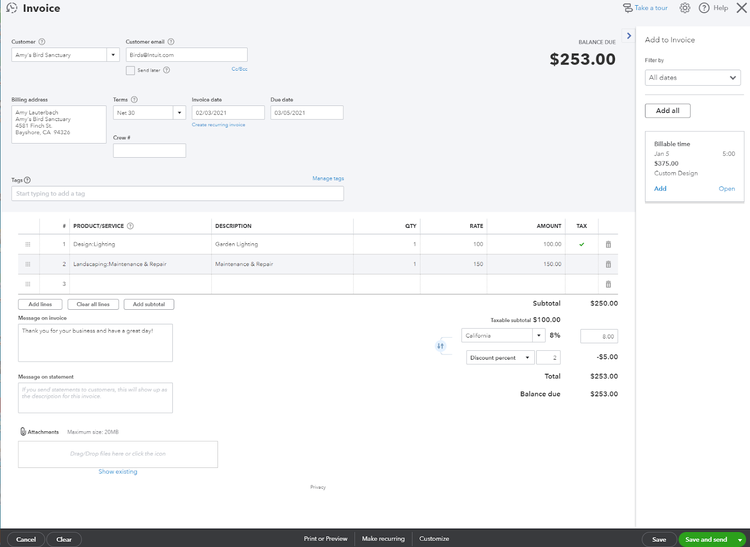
After adding invoice details, additional options appear. Image source: Author
6. Add billable hours
One of the nice features found in QuickBooks Online is the option to add billable hours to any invoice that you’re creating.
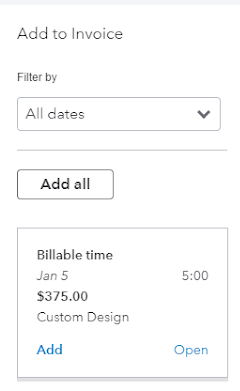
You can add billable time to an invoice during the invoice creation process. Image source: Author
For example, if your customer purchases a decorative pond for their backyard, you can invoice the cost of the pond as well as the labor involved in installing the pond. This allows you to bill for all services on one invoice rather than sending multiple invoices to the same customer. A running total of the invoice amount will be displayed at the top of the invoice, updating as additional charges are added or removed.
7. Create a recurring invoice
If you bill clients monthly, you can create an invoice and choose to make it recurring, eliminating the need to create an invoice for that customer each month.
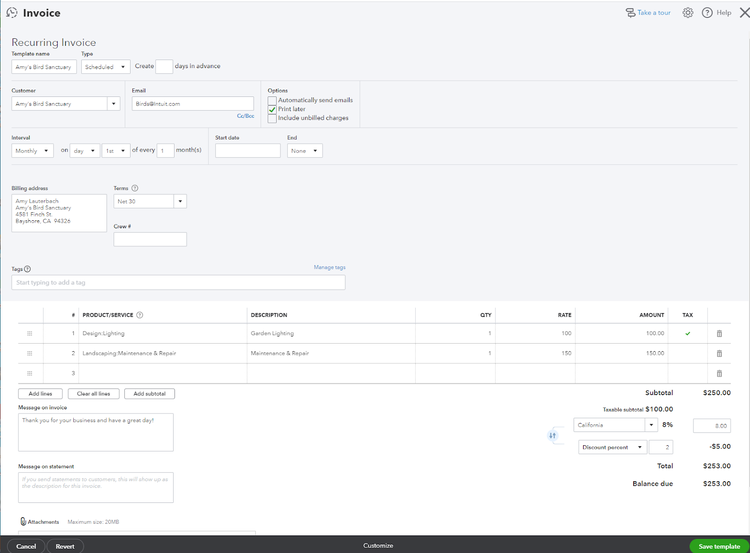
You can make any invoice recurring in QuickBooks Online. Image source: Author
You have several different options specific to recurring invoices that you can choose, including the option to automatically send the invoice via email, the option to print the invoice later, and the option to include unbilled charges. You can also choose the frequency of the invoice as well as a start and end date for the recurring invoice.
8. Choose from various save and send options
The final step when completing an invoice is usually to save it. But how do you want to save it? QuickBooks Online gives you several options including the following:
- Save the invoice
- Save the invoice and email it to the customer
- Save the invoice and start a new one
- Save the invoice and close the invoicing feature
- Save the invoice and share a link to the invoice
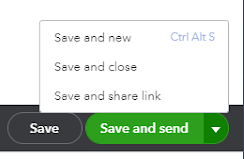
QuickBooks Online offers different save options for any invoice. Image source: Author
If you choose to save the invoice and later want to send it to your customer, you can do so by simply accessing the invoice from the sales option.
9. Review all invoices
If you need to review all of your invoices or want to check the status of an invoice, you can click on the Sales option on the main screen and choose Invoices. This will display a list of all invoices that have been processed to date.
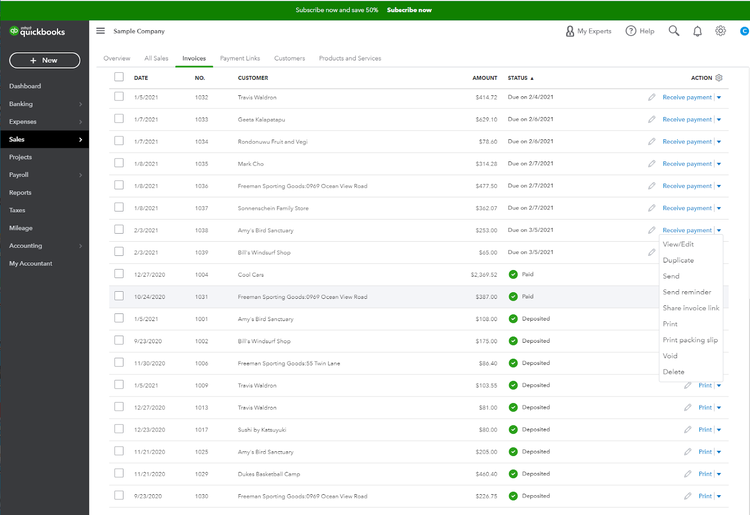
You can view the status of any invoice from the Sales screen. Image source: Author
At the top of the screen, you’ll also see the total of all invoices already processed as well as the total amount of overdue invoices. Clicking on an invoice will display an abbreviated version of the invoice as well as all related invoice activity.
For example, if you send an invoice via email to a customer, you will be able to view the date the customer opened the invoice and if they pay online, you’ll also be able to see the date the invoice was paid.
10. Follow up on past-due invoices
When viewing your invoices, you’ll also be able to follow up on any past-due invoices by sending a reminder.
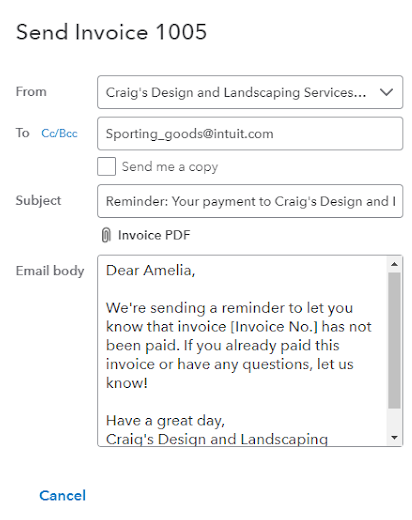
You can opt to resend an invoice to any customer. Image source: Author
Using the reminder feature will resend the invoice to your customer with a brief note, which can be customized for each customer.
Creating an invoice in QuickBooks Online is quick and easy
Creating an invoice is a necessity for any small business owner. Luckily, even those struggling with bookkeeping basics will be able to create invoices in minutes using QuickBooks Online. You can add a new customer, product, or service during the invoice creation process, easily add additional charges, and even make the invoice recurring with the click of a button.
You can also send payment reminders to any of your past-due customers and easily post payments all from the sales invoice screen. And if you get stuck, just click on the question mark up top to get immediate assistance.
For more information on how to master other QuickBooks Online tasks, be sure to check out our easy-to-follow QuickBooks Online tutorial.
For other invoicing options, check out The Ascent’s top invoicing software.
Our Small Business Expert
Mary Girsch-Bock studied accounting and business at UIC. After working as an accountant for many years in various industries, including healthcare and property management, she returned to her first love, writing. She specialized in accounting and business articles, with an emphasis on software reviews, which she wrote for more than 20 years. She continues to write for the first publication she ever wrote for, CPA Practice Advisor, while blogging for several software companies.
Share This Page
We're firm believers in the Golden Rule, which is why editorial opinions are ours alone and have not been previously reviewed, approved, or endorsed by included advertisers. The Ascent, a Motley Fool service, does not cover all offers on the market. The Ascent has a dedicated team of editors and analysts focused on personal finance, and they follow the same set of publishing standards and editorial integrity while maintaining professional separation from the analysts and editors on other Motley Fool brands.
The Motley Fool has a disclosure policy.