Published April 22, 2024
Never fear getting started building your website with Wix. With this step-by-step tutorial, you'll be ready for site building success.
When it’s time to build your site with Wix, it may seem a little bit scary. However, Wix is well-known for being user-friendly, meaning you can breathe easy.
From creating and promoting your personal brand to marketing yourself, to building up an online e-commerce powerhouse, this tutorial walks you through how to use Wix and build your perfect site with ease.
How to use Wix for your small business’ CMS
From step one of getting started with Wix until you’re ready to click “publish,” this guide has been designed to help you create a website using Wix, including first steps and using the Wix website builder.
No matter your industry or your experience, you can use these steps to get your small business’ website on Wix.
Step 1: Choose a Wix platform
When it’s time to start building your site, you are presented with two options of a Wix website maker: Wix Editor or Wix ADI. Both are easy to use, with one main difference: Wix Editor is the standard builder, allowing you to choose your template and then build via dragging and dropping.
Wix ADI takes all of the building off your plate, using AI and your answers to some basic questions to automatically make a site for you.

When starting with Wix, you have the option to build with Wix Editor or let AI build for you with Wix ADI. Image source: Author
Wix Editor is generally the ideal for small businesses, as you do not lose control or the ability to manage the brand positioning of your site. At the same time, Wix ADI would be a better choice if you have zero time to create a website.
Tips for choosing which Wix experience:
- Know your basics: Whether you use the Wix Editor yourself or will opt to answer the Wix ADI’s questions, knowing a few solid industry standards, as well as the basics of your business, will help the initial phase fly by.
- Know your budget: Whichever builder you choose, you still must sign up for a plan, so knowing if your budget is $0 per month, $30 per month, or even up to $750 per month will be necessary.
Step 2: Build into a template
You’re not necessarily making a website from scratch, but instead building and designing into an already designed template. With over 500 Wix templates available, you have plenty of choices.
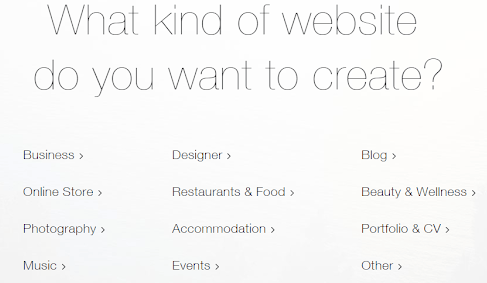
With Wix, you can choose the best templates for your site’s purpose. Image source: Author
Once you’ve selected your template, you can begin the Wix website design process. Before you get too far into the nitty-gritty, set up your design aesthetic and a central focus. You can upload images and media into the Wix library, use one of the many free images Wix offers, or opt for a mix of both.
If you have a logo or brand identity, you can upload that image at the start for Wix to auto-suggest color palettes around your branding. Ensuring your site is cohesive and a substantial part of your integrated marketing strategy.
Changing out images is easy with Wix’s click-and-point feature: Simply click on an image box to switch out a picture. Do you want to add more images? Drag a media box wherever you like and upload your photo or choose from the Wix library of royalty-free options.
Tips for building into a template:
- Narrow the field: Don’t just dive in blind. Take advantage of the template categories or use the search bar to narrow down your choices.
- Have your visuals handy: Before you begin your build, you should have your primary logo and images handy so you can design around them.
Step 3: Add and edit pages
Of course, the meat of any website is its pages and content. Wix sets you up with the basics: a home page, a blog, and a shop page, and you can edit right into those presets. You can also add as many pages as you want with the simple Add Page button or delete a page by clicking the gear icon in your Wix dashboard.
Your pages are edited live, so you see your published results as you are building, eliminating the need to preview and redo continually. Don’t bother looking for a “save” button, either, since Wix autosaves your work for you.
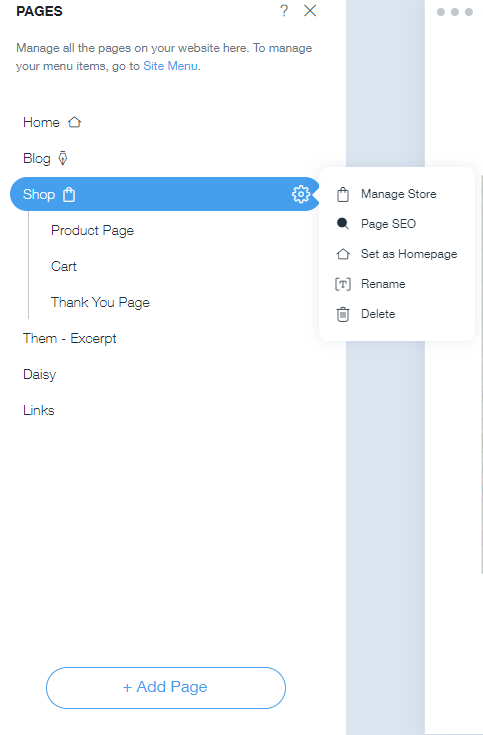
The intuitive side toolbar lets you add, edit, and delete your pages. Image source: Author
Tips for adding and editing pages:
- Don’t keep what you don’t need: Don’t be afraid to delete pages. If you aren’t selling products and you’re strictly a portfolio site, a shop page, for example, can be unnecessary clutter. You can always add pages again later, including store pages.
- Use the duplicate feature: For regular pages, the gear icon will offer the option to duplicate a page, so you can keep consistent styling throughout without having to start at square one every time.
Step 4: Select marketing integrations
After the necessary pages are built, you can prepare your site for success by adding helpful apps. From e-commerce to marketing, site management, and more, the Wix app store has a large number of integrations that you can easily select and install for your site.
You can search by category, use the search toolbar to find something specific, or simply browse through top sellers to see what’s out there.
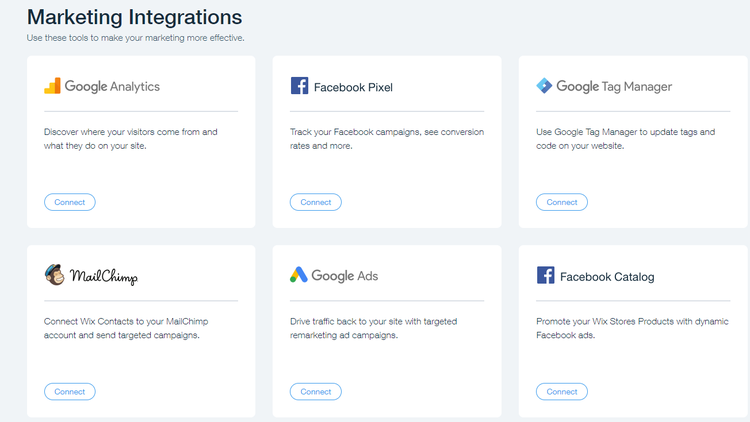
Various add-ons are available to increase your site’s performance. Image source: Author
Tips for adding apps:
- Check the pricing: Some apps are free, some have an additional cost. Make sure you know where everything stands financially.
- Be selective: The wealth of options can tempt you to go a little overboard, but rein in your enthusiasm and only install apps you need, as you need them. This tip will make management much easier and less overwhelming.
Step 5: Set up SEO tools
Whether you want nominal exposure or are all-in on website marketing, you’re going to want people to find your site easily. While there is no magic formula for ranking, Wix makes it easier to optimize your website from two points.
First, the settings gear by each page offers SEO help, walking you through optimization steps for each page, including setting up keywords and tags.
Next, you can set up more general SEO best practices for your full site from the main dashboard, allowing you to connect to Google and even redirect from old links to preserve ranking.
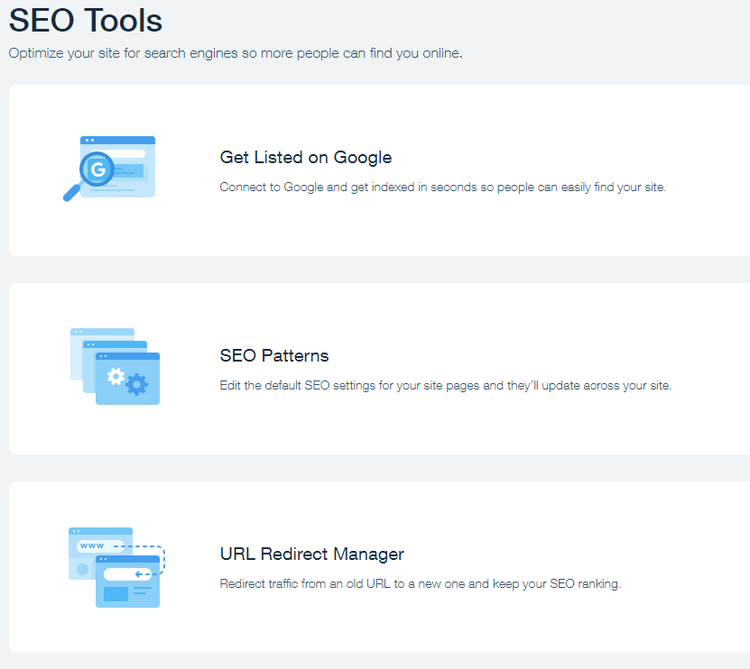
Prepare your site to rank on Google and other search engines with easy-to-follow best practices. Image source: Author
Tips for setting up SEO tools:
- Do your research: The art of keyword selection takes some research, but look into keywords used by competitors in your industry and be smart in choosing them since Wix only allows for five per page.
- Upgrade to SEO Wiz: While not available with free plans, access to the SEO Wiz takes a lot of the time and uncertainty out of creating an SEO plan. By answering some basic questions, you can allow Wix to create the most optimized plan for your needs.
Step 6: Optimize and publish
After the site is built, ready to go with Google, and SEO-primed, it’s time to publish your website and go live. Before you commit to that final step, double-check to make sure you are also optimized for mobile as well as desktop.
In Wix Editor, select the mobile icon next to the desktop icon to switch to a mobile view. Most likely, Wix will have optimized your site already, but it doesn’t hurt to check.
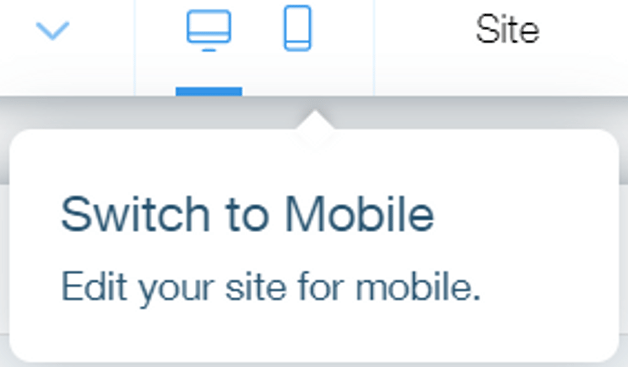
Easily switch your site view to mobile to ensure it looks good on all devices. Image source: Author
Next, it’s time to hit that big, blue Publish button in the upper right-hand corner, and that’s a wrap. You are officially live.
Tips for optimizing and publishing:
- Nothing is final: Just because you have published your site doesn’t mean you are stuck with how things are. With Wix live editing, you can change content, add or delete pages, and even do a full aesthetic overhaul from behind the scenes as often as you like. And when you’re ready to have your changes go live, just hit Update.
- Don’t skip on optimizing: Though it may seem like a small step, remember that search engines take mobile optimization into account when ranking pages, so be sure you’re mobile friendly.
Running a site with Wix
When getting any good CMS system off the ground, even a Wix alternative, there are steps to follow.
But when it comes to using Wix, setup is not only intuitive by default, it’s made easier by its user-friendly site builder. Combine that with the simple steps in this Wix guide, and you will be comfortable building a Wix website in no time.
Our Small Business Expert
Rose Wheeler is a seasoned writer and content manager with more than 15 years of experience. She specializes in content related to digital marketing, small business, personal finance, and CMS. Her work has appeared on sites such as Selz, The Cheat Sheet, and Swaay. When she's not working with her awesome clients, Rose enjoys cooking, playing games and curling up with a good book.
Share This Page
We're firm believers in the Golden Rule, which is why editorial opinions are ours alone and have not been previously reviewed, approved, or endorsed by included advertisers. The Ascent does not cover all offers on the market. Editorial content from The Ascent is separate from The Motley Fool editorial content and is created by a different analyst team.
The Motley Fool has a disclosure policy.