Published April 22, 2024
Shopify has made setting up an e-commerce activity accessible to anyone. We’ll take you through the seven steps, from beginning to launch.
The internet has brought us into the Age of Democratization. Google democratized access to information and made everyone wiser. Facebook democratized media and made everyone a movie star. Wordpress democratized journalism and made everyone a writer.
And Shopify has democratized e-commerce and made everyone a merchant.
How you can use Shopify to create an online store
You’ve filled out a business registration, and you’ve moved through an intensive product development process. Now it’s time to start selling your product, so you need to learn how to start an online store using an e-commerce platform.
This Shopify tutorial will take you through the seven steps that will lead from free trial to first visitor.
You probably have an idea for a store name. Maybe you even wrote a company description and designed a logo. If you have photos and images that illustrate your activity, keep those handy, too. You’ll need all of this during the process.
The more you have prepared at the outset, the quicker you can get online, but even if you don’t have everything under control just yet, you can start with Shopify. One thing in particular that sets it apart is the Shopify Exchange marketplace.
If you’re ready to start doing business but not sure you want to go through the entire setup process yourself, you can buy an existing Shopify store on the Exchange marketplace instead.
Most importantly, though, you should have your products ready. If they came out of a structured product development process, then you probably have titles, descriptions, images, and prices available for them already.
If they’re physical products, you’ll likely have one or more locations where they’re stored, and you probably have a fulfilment and delivery solution in mind.
Step 1: Start your free trial: Sign up with an email address
The first step with Shopify is to set up your free trial. All you need is an email address and a store name. Set up a password at this stage for logging into your account in the future. Once you’ve completed the initial registration and questionnaire, you’ll arrive on the dashboard page within Shopify. Your account is open.
On the Shopify homepage, the link to the free trial is at the top right. Image source: Author
Free trial best practices:
During the sign-up process, Shopify will send you an email to verify that the address you entered is yours. Registering a password and verifying your email address are important steps that make access to your future Shopify store secure.
After email verification, Shopify will present another questionnaire about yourself and your project, and the Dashboard will be constructed based on the information you provide. Select your type of activity carefully.
- Secure password: Whatever password you create, make it long and memorable, so it will be easy to remember, difficult to crack, and won’t need to be written down.
- Do this seriously: Don’t rush through the initial setup. You’re in the launch phase, and you need to determine the correct parameters for your business. Give your business category some thought.
Step 2: Familiarize yourself with Shopify
After setting up your account, you’ll immediately gain access to the Shopify interface. You’ll land on the Dashboard page, which is where you’ll see a recap of your activity once you launch your e-commerce store.
However, at this initial stage, everything you see on the Dashboard will be related to the launch of your store. In the menu on the left, you’ll find all of the options for setting up and managing your store.
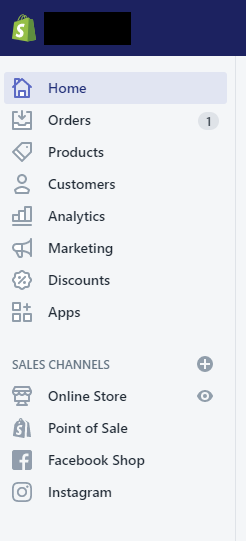
This is the navigation menu from Shopify. Image source: Author
Tips for familiarizing yourself with Shopify:
It’s a good idea to work your way through all of the items on the navigation bar to make sure you understand what hides behind each of them. However, several of them, such as Orders, Customers, and Analytics, won’t make sense until you’ve had your first few sales.
- Shopify Academy: A great way to get familiar with Shopify is by using Shopify Academy. It’s a series of free online courses covering all of the aspects of e-commerce with Shopify -- and beyond. Begin with the course named “Getting started with Shopify.”
- Settings: Below the navigation bar, at the very bottom of the screen, you can access the settings for the store. These will soon become relevant, so have a look at them.
Step 3: Add products
The best way to start setting up your store is to add a product right away. It makes the whole process more fluid, understandable, and tangible. An empty shop will be difficult to work with.
If you don’t have your own products to sell, you can find some via other services. Shopify has integrated services such as Oberlo, Printify, Dripshipper, and many more.
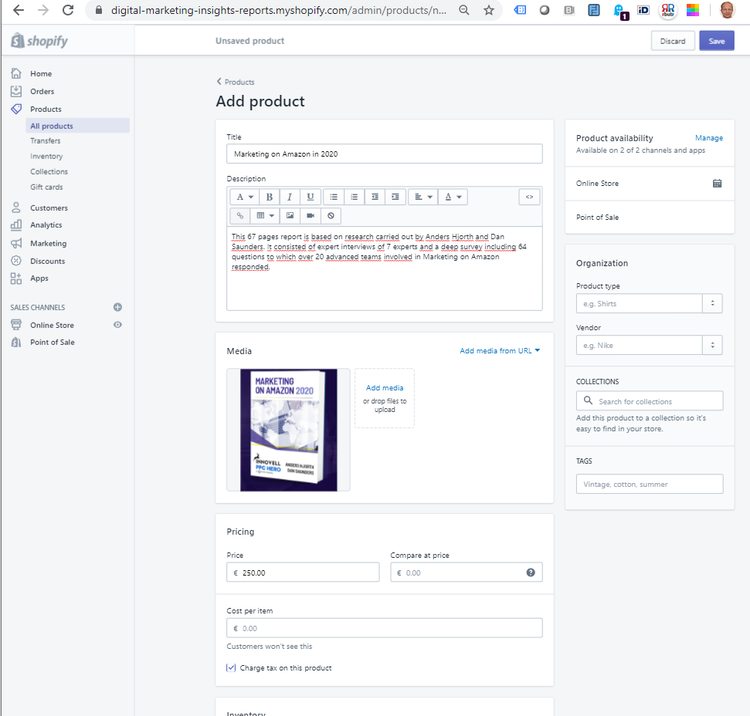
It’s easy to add a product in your Shopify store -- simply fill in the categories, such as title, description, and pricing. Image source: Author
Tips for adding products:
For each product, you need to pick a title, add a description, upload at least one image or photo, and define the price. You can also add a Stock Keeping Unit (SKU) number if you want. You can then enter available inventory per storage location as well as shipping information and fulfilment details.
- Work in concentric circles: While entering your first product, you’ll realize what information you don’t yet have. Write it down, and continue moving forward with the process. You can always revisit and complete that task later.
- Visuals are key: Product visuals will be key for the attractiveness of your product(s) and your store. Photos should be high resolution, sharp, and colourful. Shopify provides stock photos for you to use, but you’d probably be better off using them for the store instead of your products.
Step 4: Store settings
Now that you have something to work with, and you’ve gotten a feel for what’s required to sell your products, let's address the store settings. You can find the Settings button at the bottom left side of your screen, below the navigation bar.
First, focus on completing the general settings -- on setting up payment, shipping, taxes, and legal.
Also set up languages, if they apply to your store. These settings can be a bit complex, but once they’re in place, you won’t have to look at them again unless your store undergoes major changes.
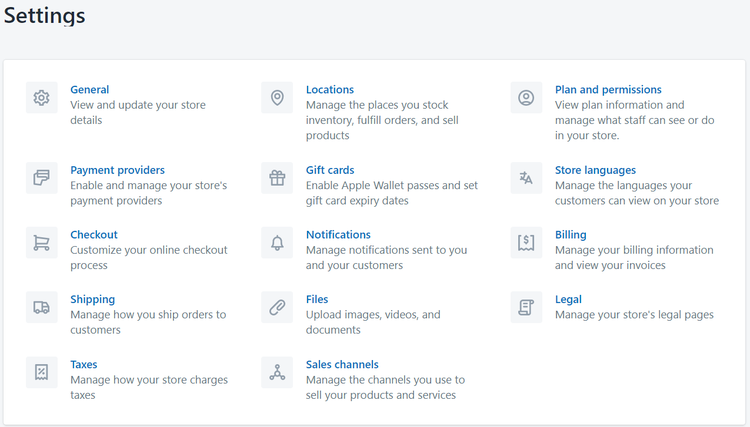
In the Settings section, concentrate on General, Payment, Shipping, Taxes, Locations, and Legal for now. Image source: Author
You can save Check-out, Gift cards, Notifications, Files, Sales channels, and Plan and permissions for later, but don’t hesitate to familiarize yourself with them at this stage.
Tips for store settings:
If you’re planning to sell a physical product, shipping will be an important part of setup. Detail where your stock is in Locations, and set up the details for fulfillment in the Shipping section. This is also a good time to set up your taxes.
General information is straightforward as long as your business registration is in place.
The same goes for setting up the payment system. Like for your product details, if you’re missing one or more elements for your store, write them down so you can address them later, and continue completing the rest.
- Things to NOT save for later: You may be tempted to save shipping, taxes, and legal for later, but these are the things you need to solve now. Anything related to marketing, sales, and user experience can wait.
- Enable test mode: A useful feature in the payment setup is to enable test mode. This will help you better understand the payment user experience before launching.
Step 5: Define additional apps you may need
While addressing the settings, you may have discovered some functions you need that were missing. Perhaps you’re selling a digital product and need a solution to provide the download for an immaterial sale. Or maybe you need a flexible invoicing system to use with your store.
If so, it’s time to visit the Shopify app store to identify any extra apps you might need to make your e-commerce business fully functional.
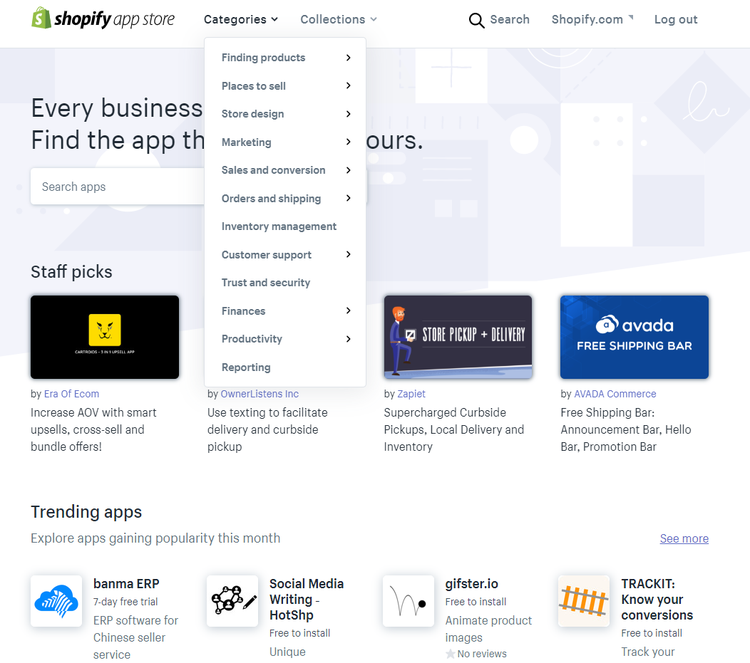
Search for any additional apps you might need in the Shopify app store. Image source: Author
Tips for finding apps:
As in any other app store, some of the apps are free, and some come at a cost. Identify and test the apps you need for launch, but don’t get lost in marketing or sales apps yet.
- Marketing apps are for later: Focus on e-commerce functionalities for now, not on marketing or sales apps -- there will be time for those later.
- Reviews: Read the reviews for apps that pique your interest to make sure they can perform the functions you need.
Step 6: Design the store
At this point, you’ll be done with some of the most complex tasks. You may need some more time to fully flesh out the store settings, but while you do this, you can start designing the store itself.
You can do this via the Shopify website builder, which is essentially an express service to help build your website from scratch.
Some Shopify alternatives, such as WooCommerce, rely almost exclusively on the Wordpress format. While Shopify uses the same notions of Themes, Pages, and Posts to build a store, the user-friendly interface is intuitive for users of various backgrounds, allowing you to drag and drop items and reorder them visually.
You’ll need to choose a theme in harmony with your brand positioning as well as the type of products you sell. You’ll also need to write text for your site and find great images for illustrations and backgrounds.
Tips for designing your store:
In the navigation menu, click on “Online store.” Start with Domains. Shopify will have already set up your store on a subdomain (yourshop.shopify.com), but you might want to move it to your own domain. If you don’t already have one, you can book that through Shopify as well.
Then move on to picking the theme. Once your domain is active and your theme selected, it will be time to write the content and organize your site. You can also add things such as newsletter subscriptions and announcement bars at this stage.
Finally, remember to set up various metric tracking for your store under Preferences.
- Revisit Settings > Checkout: Now that your site is more complete, start thinking about the user experience, and revisit the Checkout functionality in the settings.
- Site map: A good way to conceptualize your site is to draw a site map. From your homepage, what content and products will the user be able to reach? This will help you organize your navigation and collections.
- Use Burst for images: Shopify provides free stock photos for building your store via its own service, Burst.
- Password protection: Keep the store password-protected for now, while you’re setting it up. You don’t want your shop to be visible to the public while it’s still under construction.
Step 7: Launch your e-commerce site
Before you can launch, you’ll need to have entered all of your products; completed the steps for payment, legal, shipping, and taxes; set up your domain name; and designed your store with a theme and descriptive texts.
Now it’s time to test the user experience, have other people visit the (still password-protected) site to give you feedback, and test the payment process.
Don’t hesitate to remove the password as soon as you’re happy with your store. You can still improve it further. When you’re ready to launch, it will finally be time to think about your e-commerce marketing strategies.
Tips for your e-commerce launch:
Visit the Marketing tab on the Shopify navigation menu, and consider using Google or Facebook for marketing your site. Also consider email marketing for your e-commerce site: You can start collecting email addresses via a newsletter from the very beginning.
Shopify provides a discount code functionality you can use to give a sense of urgency or privilege to users you contact. You’ll achieve the best results possible if you employ an integrated marketing strategy, where you use multiple channels and tactics to attract and convert visitors.
- Use newsletter subscriptions: You can set up a newsletter within the theme of your choice. If you have this ready from the beginning, it will help you collect email addresses to use in your marketing efforts.
- Give it all you’ve got: When you’re done testing, announce your e-commerce launch to everybody you know, and via all of the channels you have access to. You might want to create a launch discount code as well.
Your products have now been “shopified”
Shopify has done a great job of democratizing e-commerce by simplifying or even taking away most of the technical challenges of building an online store. As you may have realized, this doesn’t remove important tasks related to business registration, bank accounts, legal compliance, or managing inventory and shipping.
One might imagine e-commerce to be infinitely complex, but Shopify removes any potential technical barriers between you and a successful online store, reducing them to simpler steps that should seem manageable even to e-commerce novices.
And with our step by step guide, you can concentrate on your products and your marketing and become the successful entrepreneur you wanted to be.
Our Small Business Expert
Anders Hjorth is the author of four digital marketing insights reports and the founder of Innovell, a Digital Marketing consultancy researching trends in digital marketing. As a pioneer in SEO, one of the first Google Advertising Professionals, and the co-founder of several agencies, he has broad and long-running experience across SEO, paid search, social media, and content marketing. Anders was COO for GroupM Search across EMEA. Anders is also an active member of various awards juries and advisory boards including the Paid Search Association.
Share This Page
We're firm believers in the Golden Rule, which is why editorial opinions are ours alone and have not been previously reviewed, approved, or endorsed by included advertisers. The Ascent, a Motley Fool service, does not cover all offers on the market. The Ascent has a dedicated team of editors and analysts focused on personal finance, and they follow the same set of publishing standards and editorial integrity while maintaining professional separation from the analysts and editors on other Motley Fool brands.
The Motley Fool has a disclosure policy.